|
How to create a course that spans multiple maps
|   |
|
How to create a course that spans multiple maps
| |
Condes supports courses that span multiple maps.
A course can start on one map, then continue on another map, for example when the course spans two adjacent areas that have separate maps. Another example is a course that uses a different map (e.g. a maze) for part of the course.
This is an example:
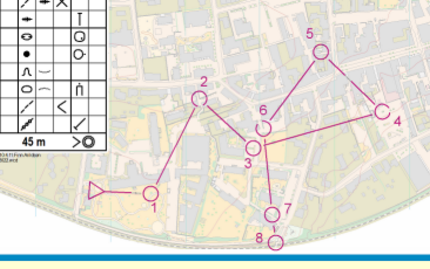
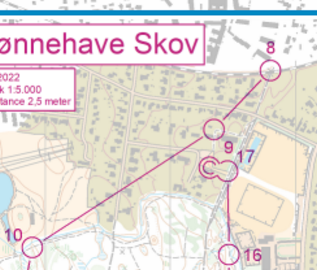
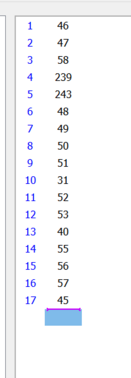
The example shows a course where the first part (1-8) is on one map, and the second part (8-17) is on another map.
|
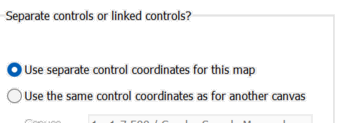
In the Condes event, the course is ONE course. When printing the course, Condes detects which controls are on one map and which are on the other, and automatically splits the course in two parts. Each canvas is set up so that you can create controls that are shown only on that canvas. See below how to set up "separate control coordinates". You can still have controls that are "shared", e.g. a common control where the map change takes place - simply create a control with the same control code on both canvases. This control has ONE control description, but you can move the circle independently on each canvas. On each canvas you create only those controls needed on that canvas. In the example, control 8 is created on BOTH canvases. |
|
How do I print the two parts?
When printing, print each canvas separately, e.g. first print Canvas 1, and then print Canvas 2.
Can I show both maps on the same page?
Yes, it is possible to show both maps on the same page. Please read the topic: Showing multiple parts of the course side-by-side on the same page
What if the maps are adjacent, but do not overlap?
If the maps are adjacent, but do not overlap, you can create a marked route between the two maps by using an End of Marked Route point. Place the End of Marked Route point on Canvas 2, then insert it in the course after the last control on Canvas 1. (or vice versa if the course starts on Canvas 2). Using a marked route allows you to enter a distance for the marked route, so that the course length can be calculated correctly.
If you do not use either 1) a control that is shared between Canvas 1 and Canvas 2, or 2) a marked route using an End of Marked Route point, then Condes cannot calculate the total course length.
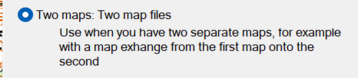
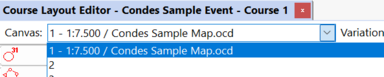
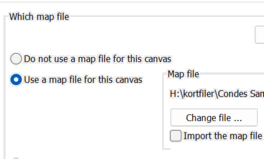
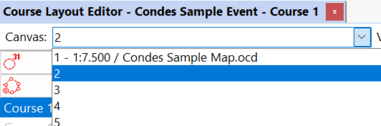
How do I set up the maps?
Place each map on a separate canvas. You can do this at the time when you CREATE the event, by selecting "Two maps: Two map files" in the event wizard:
However, if you forgot to set this up when you created the event, it is still simple to manually set up the maps. Follow these steps:
That is it, now you can start planning the course!
Please also refer to How to handle map change