|
How to create a relay course
|   |
|
How to create a relay course
| |
How to create a relay course
While you can "draw" a normal course by clicking on the control circles that you want to include in the course, when you want to create a relay course, you need to use the Course dialog.
The Course dialog works with existing controls, i.e. you cannot create new controls while in the Course dialog. This means that before opening the Course dialog, you need to create the controls by using the "New control" tool ![]()
When you have created your controls (not necessarily all of them, as you can iterate the process as needed):
Add a fork to the relay course
Use the "insert fork" buttons on the "Relay" tab to insert a fork into the relay course:
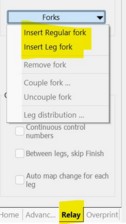 Select either "Regular fork" or "Leg fork"
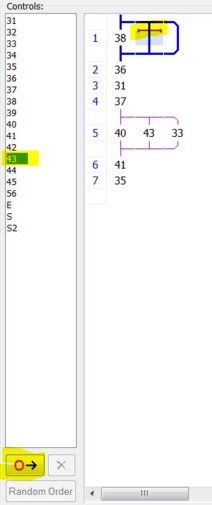
The fork is inserted at the "insertion point", indicated by a purple insertion bar.
Add controls to the branches
You can now insert controls into the branches.
Configure a leg fork
To configure a leg fork, double click on the blue part of the fork. This brings up the Leg Distribution Dialog, where you can configure which legs run which branch. See more details on the Condes Relay Support page.